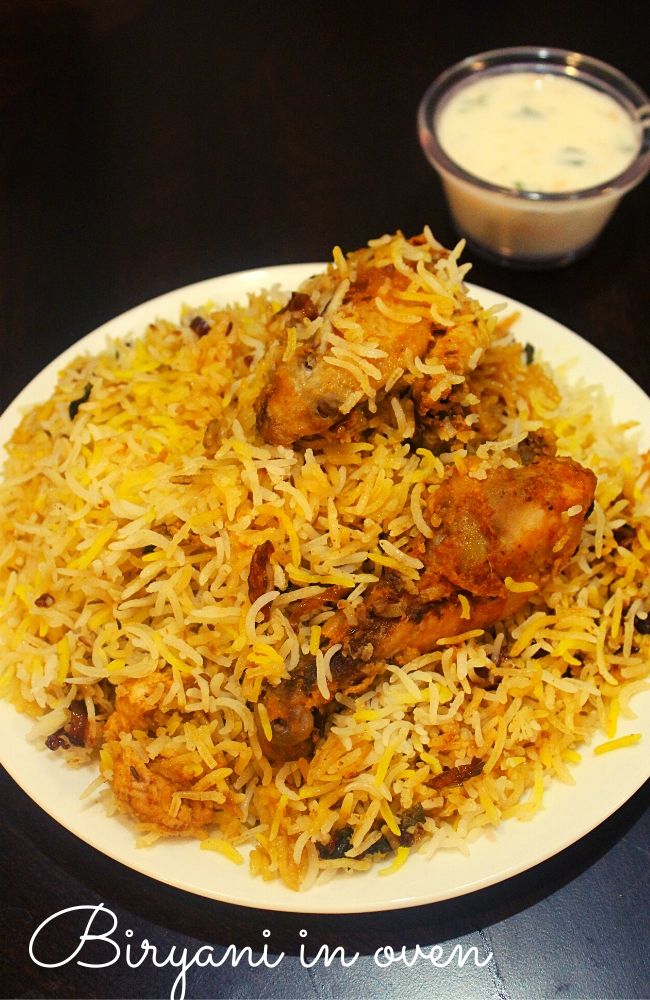
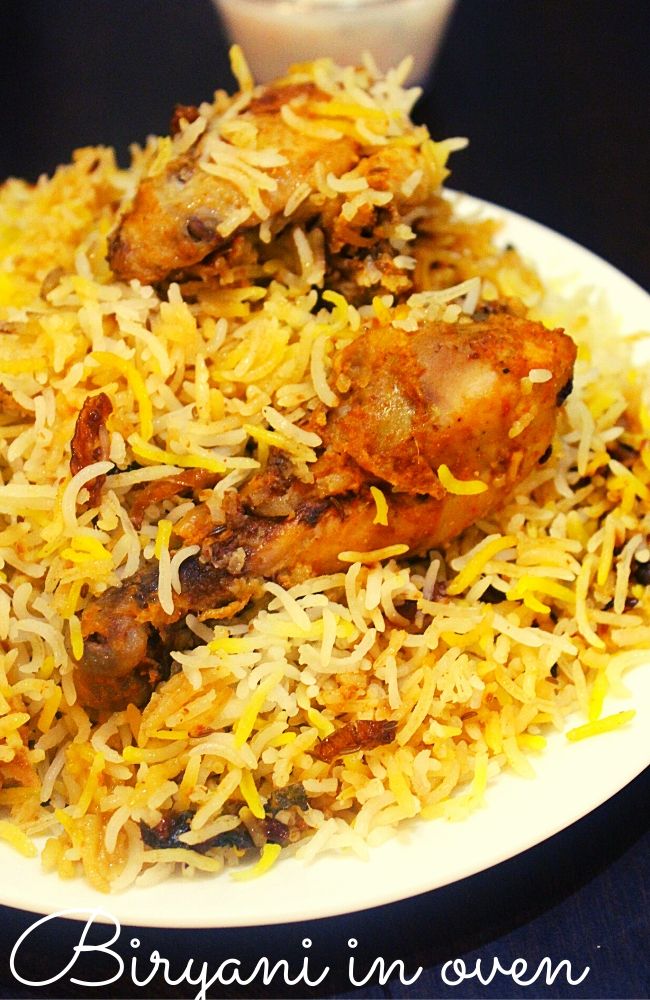
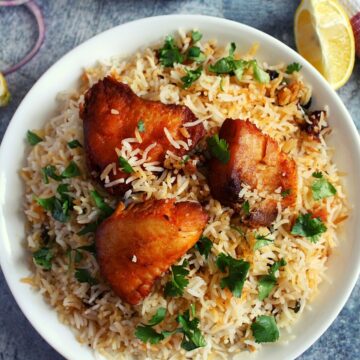
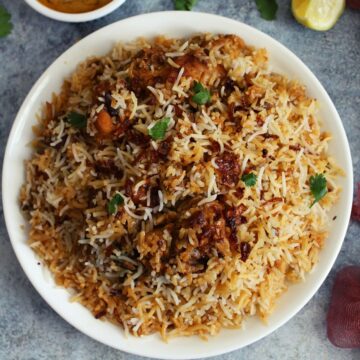
Chicken dum biryani here is made in the oven and is one of the simple methods of making biryani in homemade kitchens without any hurdles.
The biryani made here is done using chicken perfectly baked in the oven along with the long-grain basmati rice and aromatic spices in the cooker.
Check out other biryani recipes on the blog made using traditional methods such as Hyderabadi chicken biryani, anda biryani, etc.
Also, there are other chicken recipe collections to check out, such as chicken breast recipes indian style.
Jump to:
What is the difference between oven-baked biryani and stovetop?
- Chicken biryani in the oven is almost similar to the one made on the stovetop, but the only difference is dum should be done in the oven.
- In dum biryani, the arrangement is made in such a way that marinated chicken is placed at the bottom and rice over the chicken.
- To make it on the stovetop, the above arrangement is made in a heavy-bottomed flat vessel, and to make it in the oven, the above setup is done in a baking tray, and the tray used here is made of aluminum. These baking trays are readily available in hypermarkets.
- Dum is given on the stovetop by placing a tawa/skillet below the cooking pot, sealing the lid tightly, and putting on dum for at least an hour for chicken biryani.
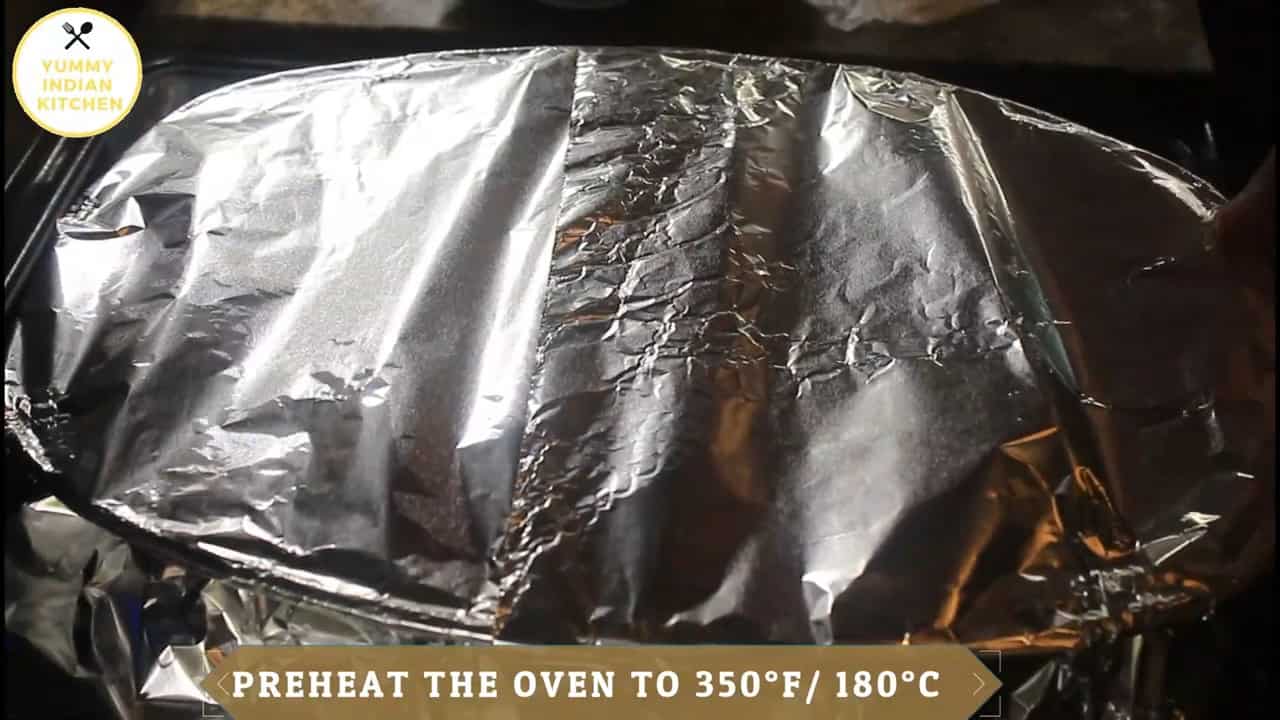
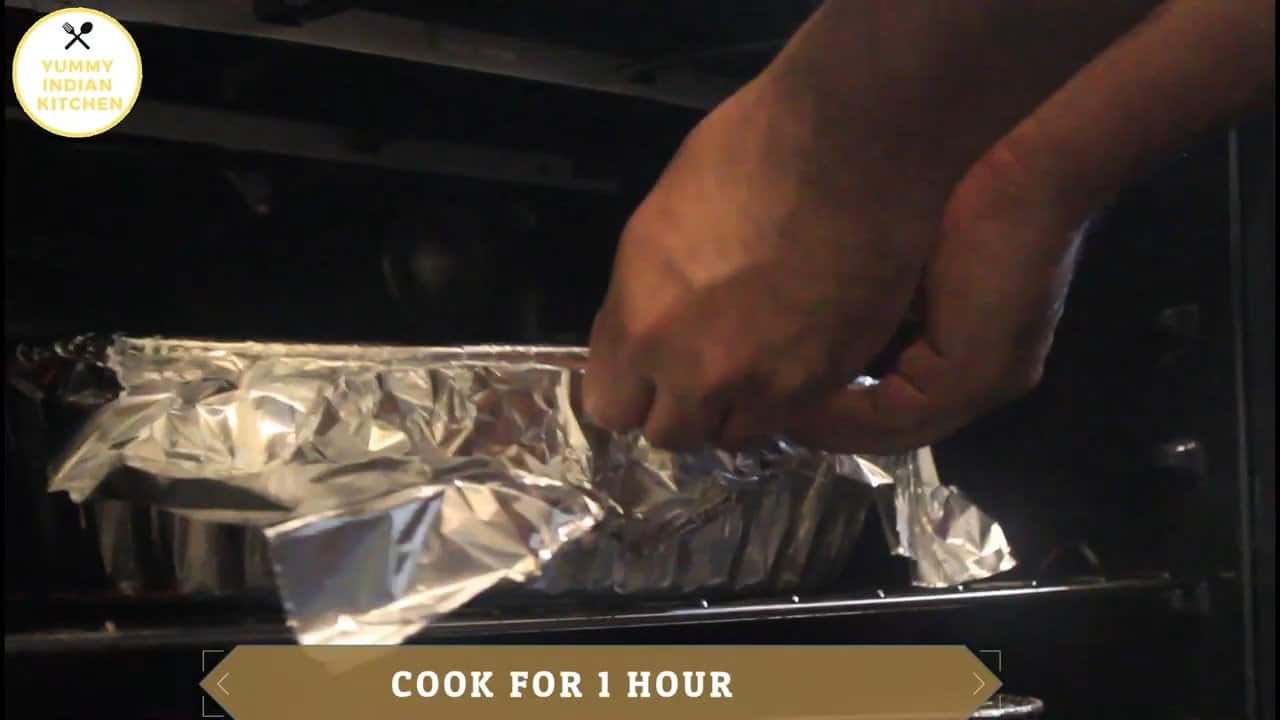
- The oven-baked method is similar in giving dum, and the baking tray has to be sealed tightly with aluminum foil and placed in the oven, which is preheated at 350°F or 180°C and cooked for 1 hour to get a perfectly dum biryani.
How many ways biryani can be made?
- Hyderabadi Biryani is made in two ways: Kachchi yakhni biryani and the pakki yakhni biryani.
- In Kachchi yakhni biryani, the chicken is marinated and placed on the dum along with the half-cooked rice.
- In pakki yakhni biryani, the chicken is precooked and then layered along with almost cooked rice and put on dum for less time compared to the kachchi yakhni biryani.
- Here, the chicken biryani in the oven is made in Kachchi yakhni style, where the raw chicken is marinated, the rice is half cooked, and both are arranged together and put on dum for a long time.
- Both methods are acceptable and give good results, and the outcome is perfect.
- The below recipe is a mouth-watering dum biryani that tastes good and is one of the best chicken recipes made on the blog.
I decided to share this article after I started staying abroad, where I found out that making biryani on a cooktop is less preferable and it is best to use an oven to make it.
Therefore, after trying it out along with my Hubby, I found out that this is the best way to make dum biryani if there is difficulty in finding Indian utensils abroad.
The biryani in the oven is baked quickly, does not burn at the base, and comes out with long-grain rice and perfectly cooked chicken.
Tips
- The marination procedure for chicken is the same.
- The procedure to cook the rice is similar and done in a cooking vessel until it is ¾ or 75% cooked.
- The baking tray we use should be broad and long, and it is readily available in the market.
- The temperature should be preheated, then the tray should be kept inside the oven and then cooked for at least an hour or ten more minutes.
- I have shared a video procedure below that helps make this biryani a much better way and is easy to understand.
Side dish for biryani
It can be eaten plain or with raita such as onion raita, cucumber raita, bagara baingan, baingan masala or mirchi ka salan, gutti vankaya curry.
Below are the step-by-step details to make dum biryani in the oven, along with a video stay tuned as there will be many more biryani recipes that will be shared on the blog.
Different biryani recipes are made on the stovetop and in the oven and cooker rice recipes.
Step-by-step procedure
Step 1(Marination)
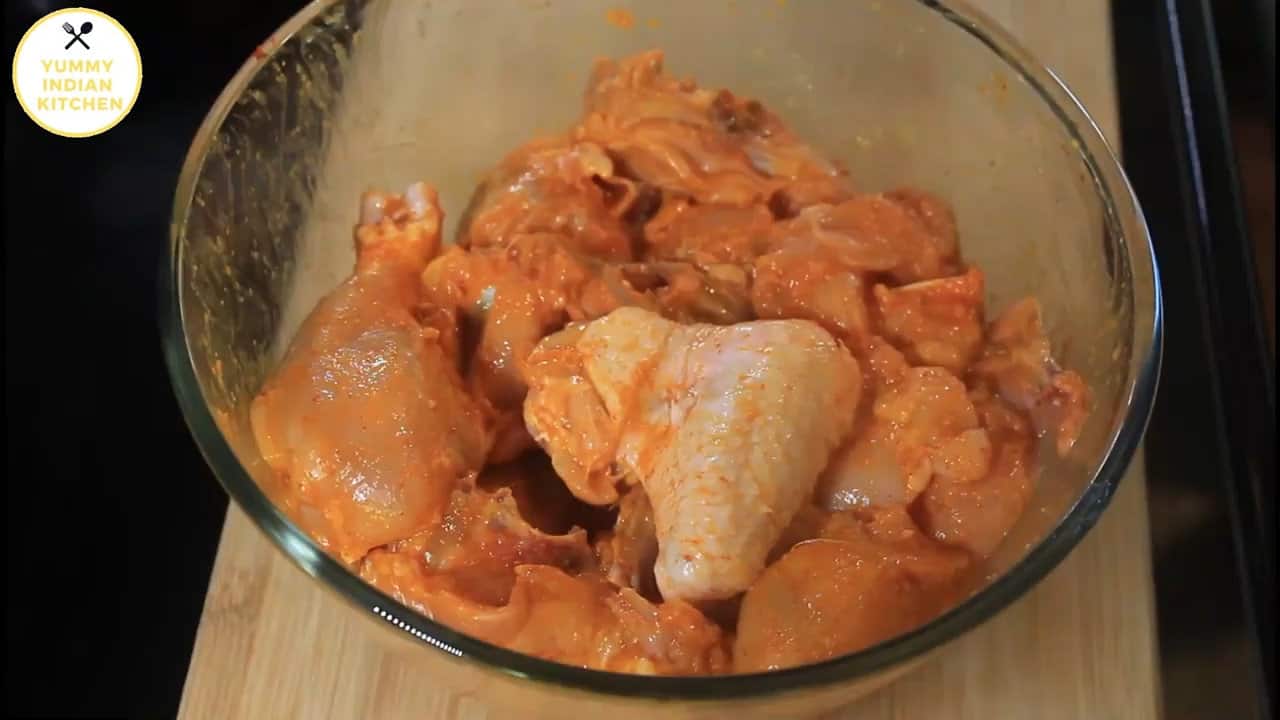
- Drain the water from the chicken thoroughly. Take a mixing bowl, and add the chicken pieces. Add turmeric powder, red chilli powder, salt to taste, and ginger garlic paste. Add lemon extract.

- Give everything a mix.
- Add black pepper powder, cloves, cardamoms, cinnamon, coriander powder, cumin powder, shahi zeera, garam masala powder. Add slit green chillies.

- Add oil and give a mix.

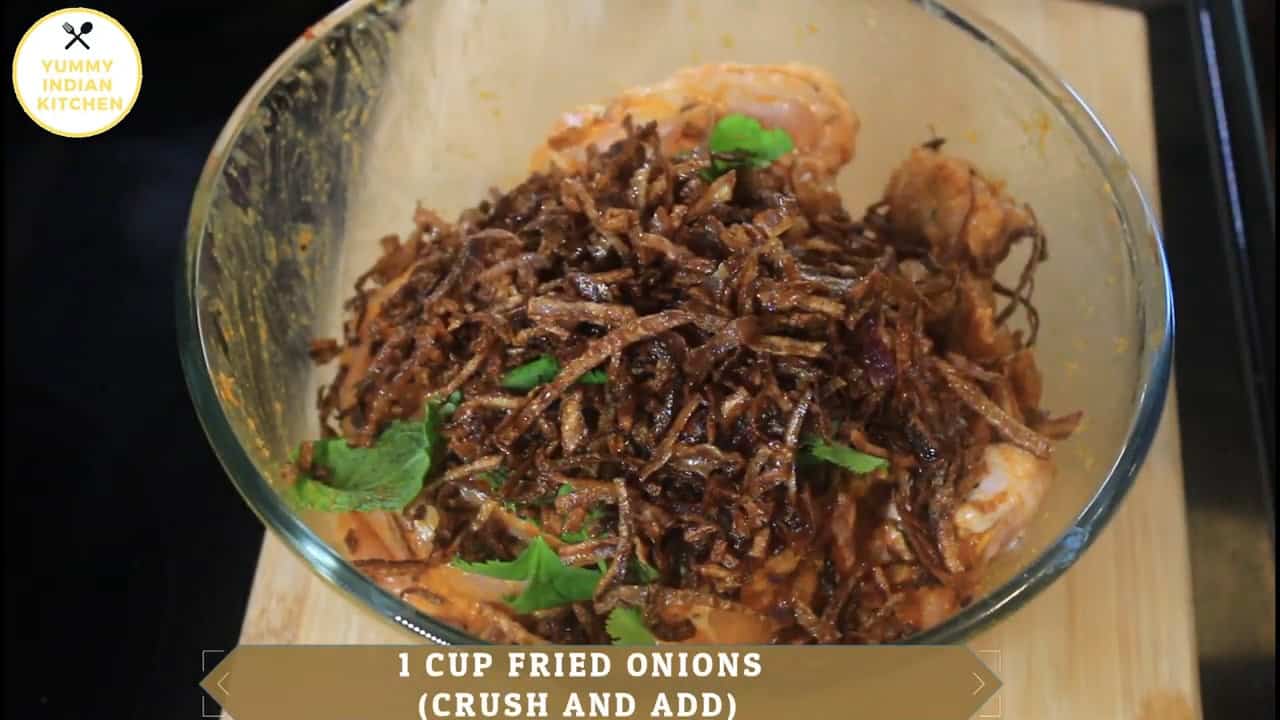
- Add in the mint leaves and coriander leaves, crush, and add fried onions.
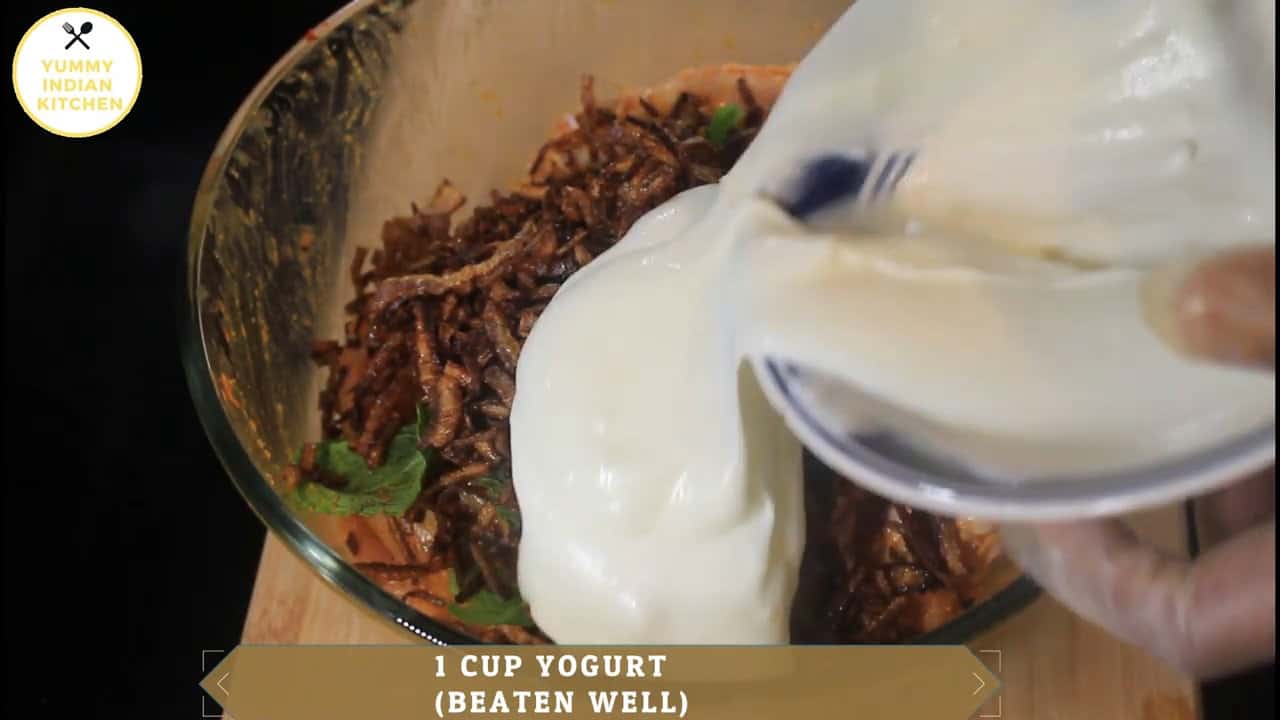
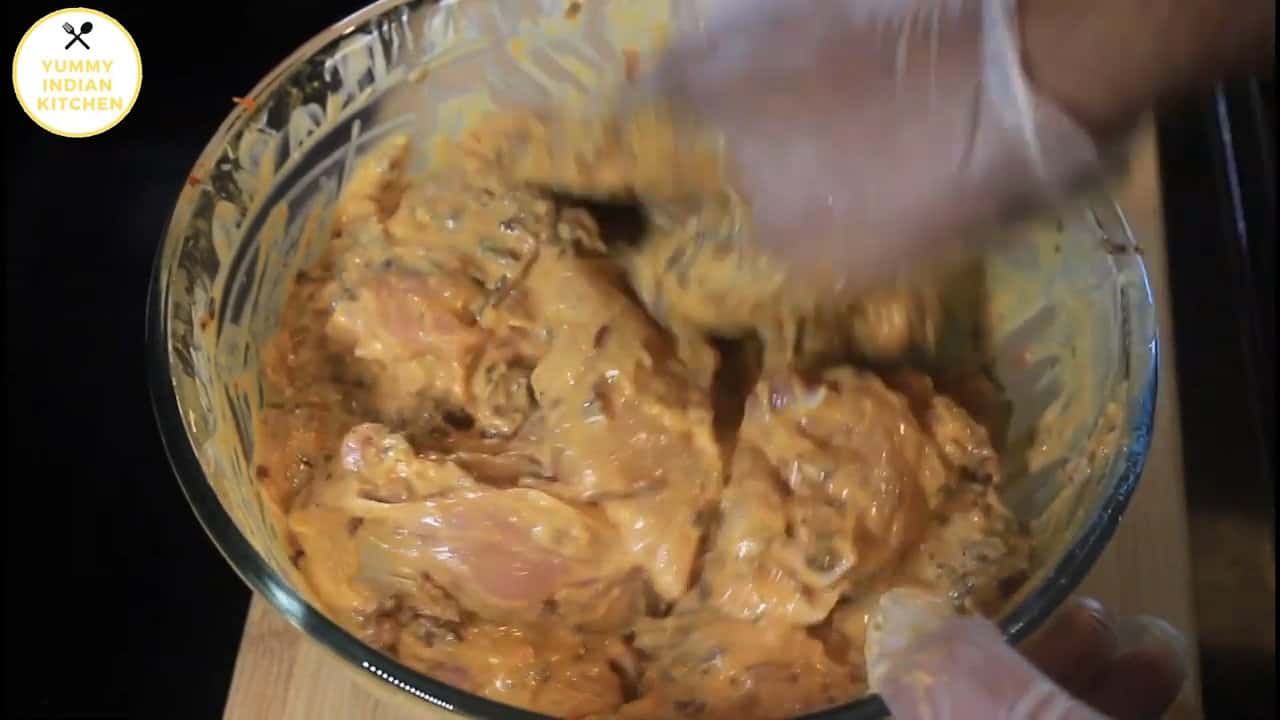
- Beat the yogurt well and add to the chicken.
- Mix everything well.
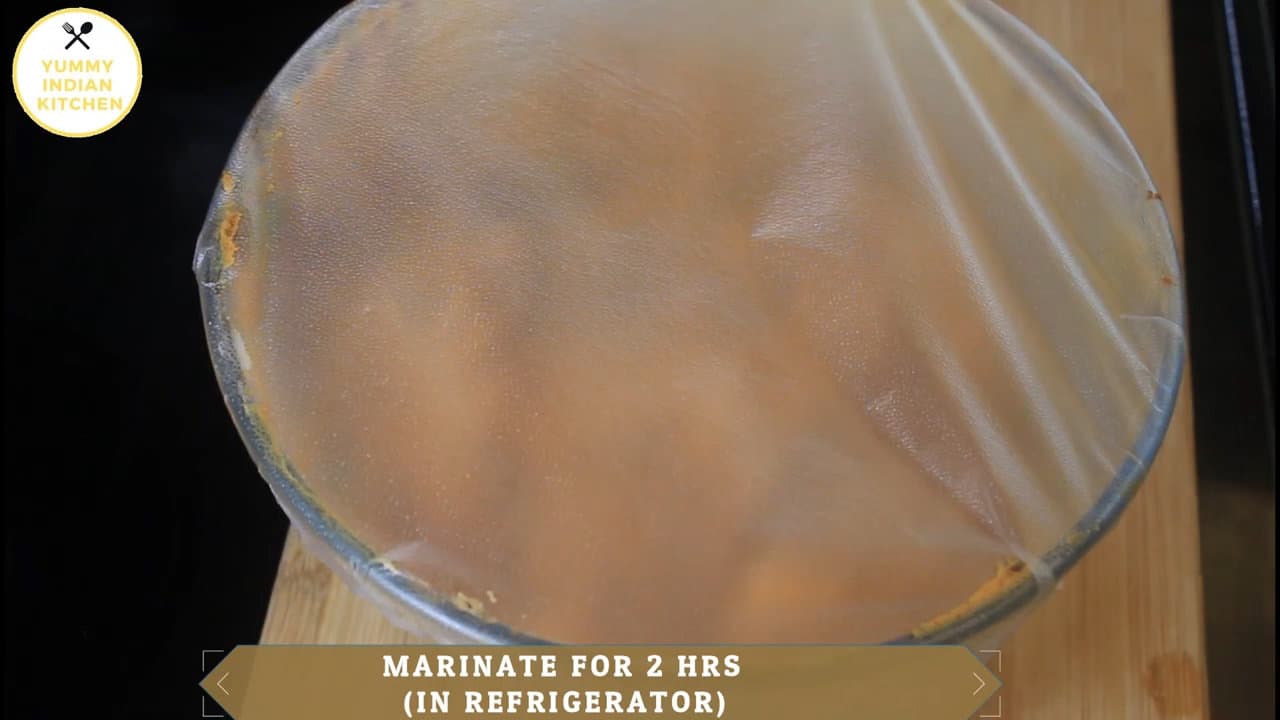
- Cover the marinade. Marinate for at least 2 hours in the refrigerator.
Step 2 (Soak the rice)
- Take about 800 gms of basmati rice, wash it thrice, and soak it for at least 45 minutes, and 1 hour is good.
Step 3 (Cook the rice)
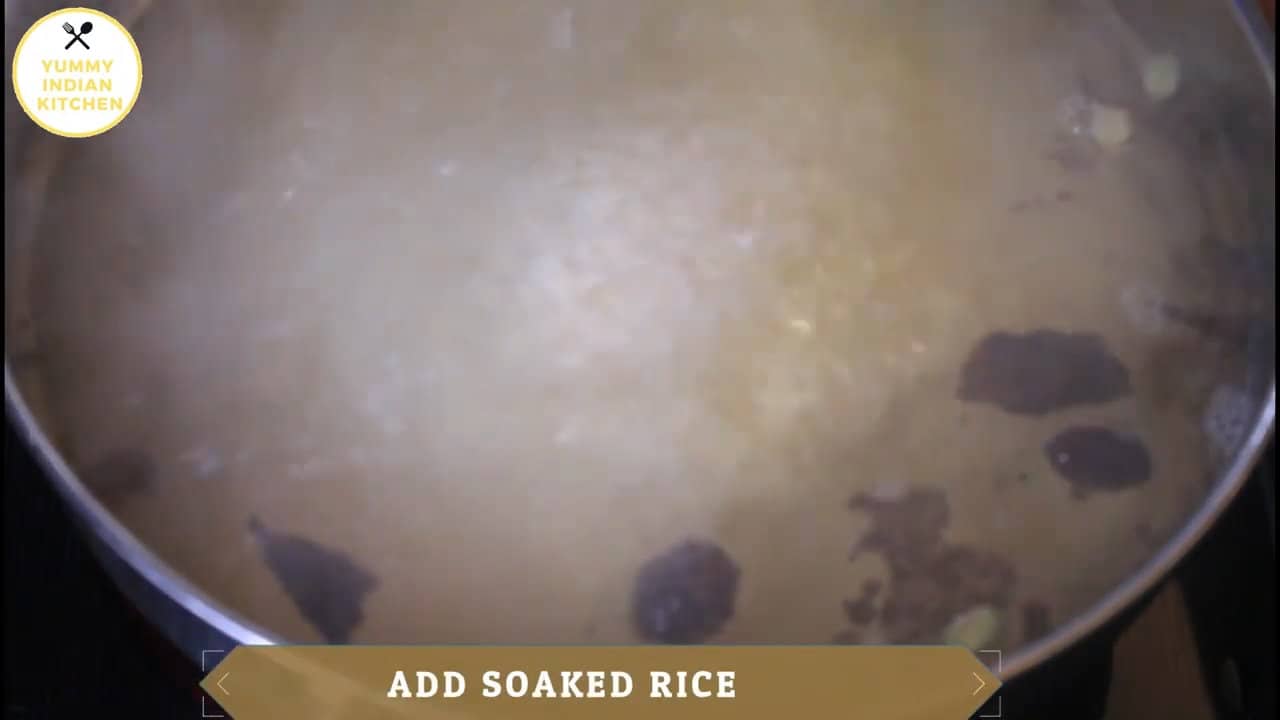
- Take a cooking pot, add a good amount of water, salt as per taste, and oil. Add whole spices such as cloves, cardamom, cinnamon, shahi zeera, and black cardamom.
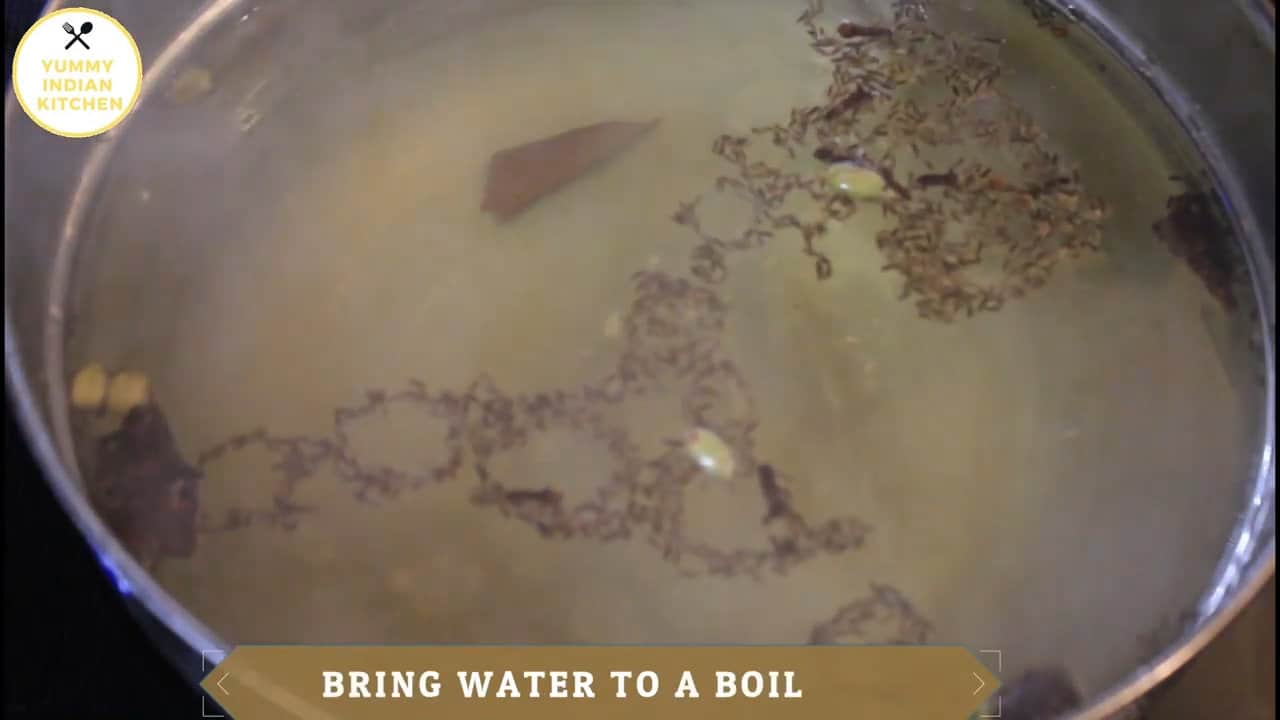
- Bring the water to a boil.
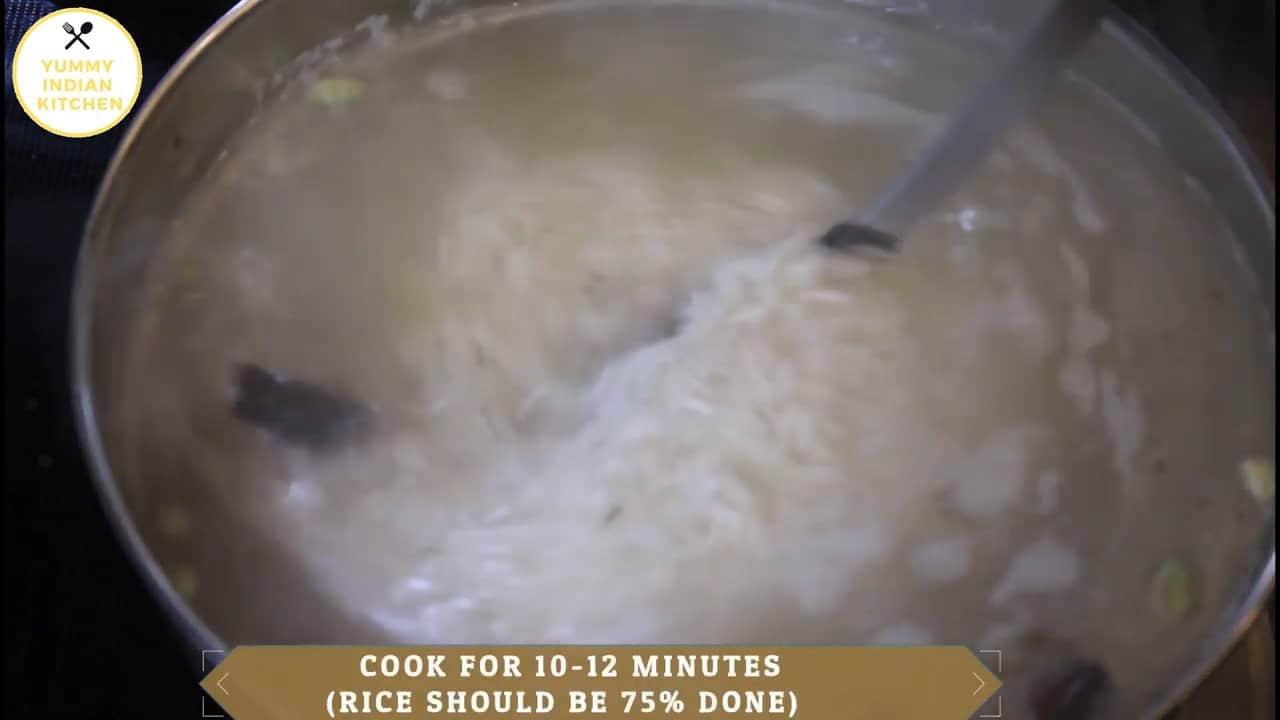
- Add the soaked rice to the boiling water and stir. Cook the rice for 10-12 minutes until it is 75% done while stirring in between.
- Switch off the flame.
Step 4 (Dum Procedure)
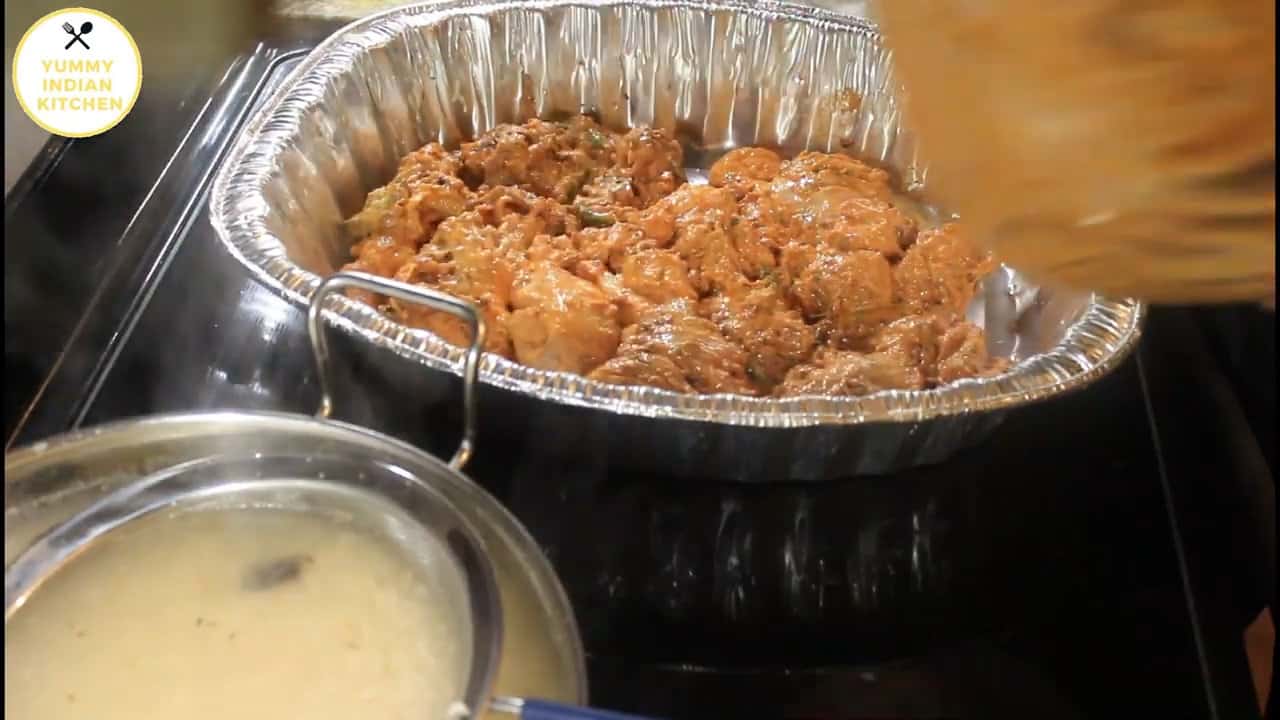
- Preheat the oven to 350°F or 180°C. Take a baking tray. Add the marinated chicken all over the base.
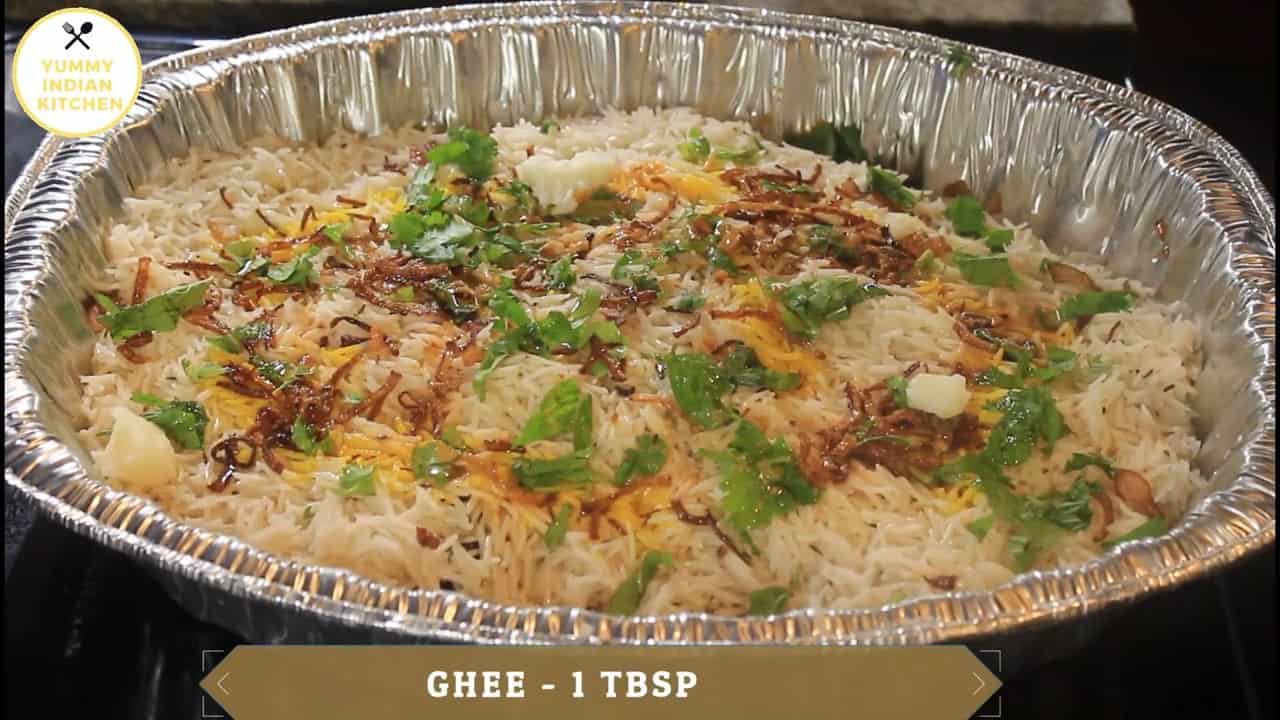
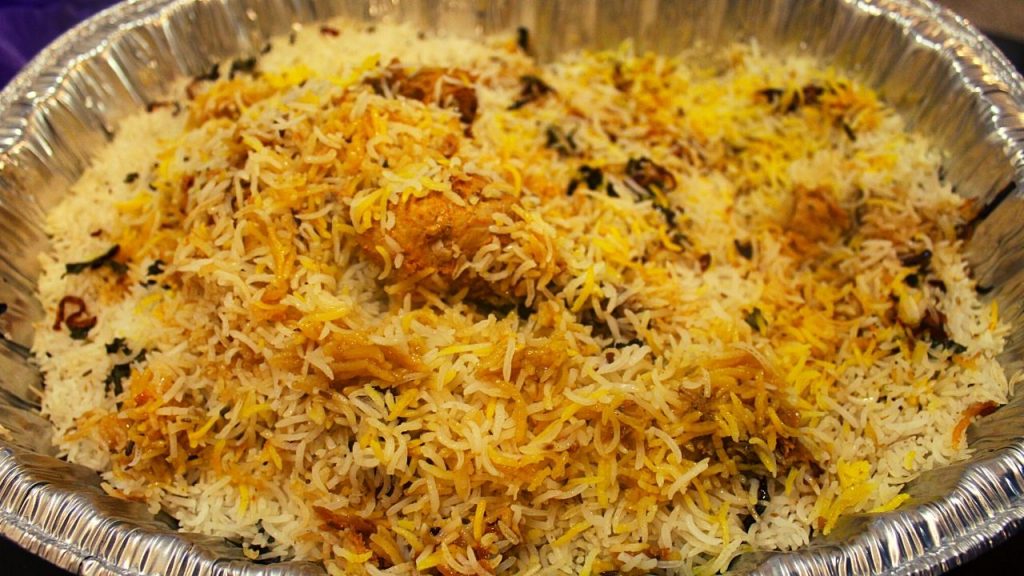
- Add the 75% cooked rice to the chicken by straining the rice with a filter. Spread it evenly.

- Top it up with some fried onions, coriander and mint leaves, yellow food color, oil, and ghee.
- Seal the tray with an aluminum wrap.
- Place the biryani tray in the preheated oven. Cook the biryani for 1 hour at the same temperature.
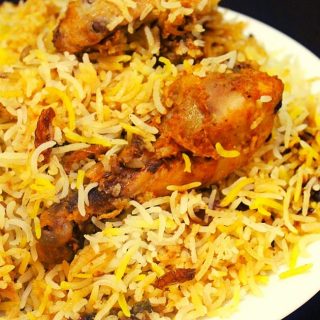
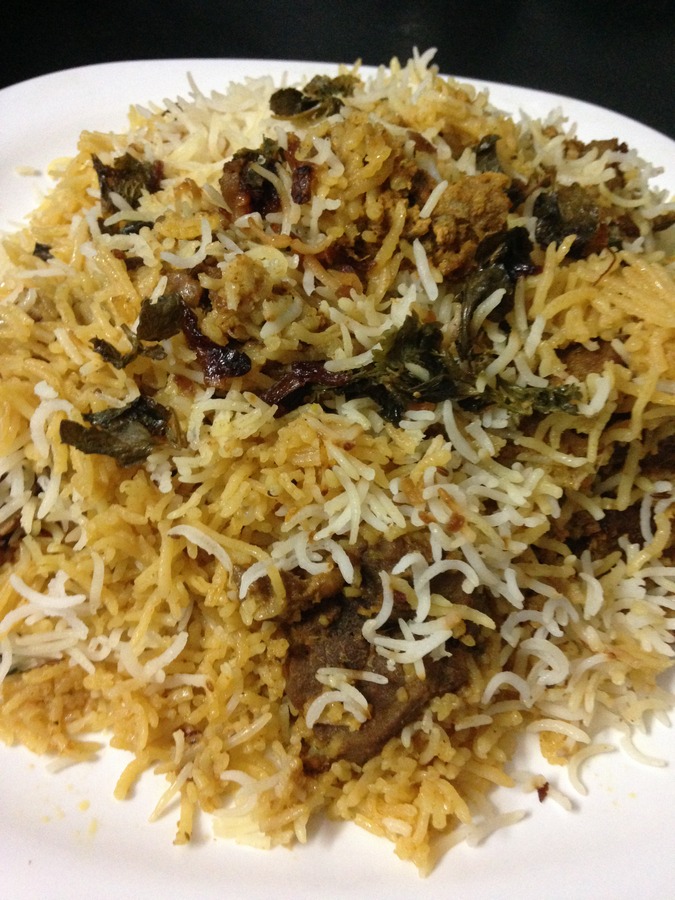
- Take it out and remove the seal and serve hot.
- Serve hot with onion raita, bagara khana or Mirchi ka salan.
Recipe
Chicken dum biryani in oven
Ingredients
For marination:
- 1 kg chicken (cleaned and washed well)
- ½ teaspoon turmeric powder/ haldi
- 2 teaspoon red chilli powder
- salt to taste
- 3 teaspoon ginger garlic taste
- 2-3 tablespoon lemon extract
- ½ teaspoon black pepper powder (kali mirch powder)
- 3-4 cinnamon sticks/ dalchini
- 3 cardamoms/ elaichi
- 3 cloves (loung)
- 1 teaspoon coriander powder (dhanya powder)
- ½ tsp cumin powder (jeera powder)
- 1 teaspoon garam masala powder
- ½ tsp shahi zeera/ caraway seeds
- 3-4 slit green chillies
- 2 tablespoon oil
- 3 mint leaves
- 2 tbsp chopped coriander leaves
- 1 cup fried onions
- 1 cup beaten yogurt
To cook rice:
- 800 gms basmati rice
- water to boil the rice
- 2 tbsp oil
- salt to taste
- 3 cloves
- ½ teaspoon shahi zeera
- 3 cardamoms
- 3 small cinnamon sticks
- 2 black cardamoms
Ingredients for giving dum:
- 2 tablespoon fried onions
- 2 tbsp yellow food color
- 2 tablespoon chopped coriander and mint leaves
- 1 tbsp ghee
- 2 tbsp oil
Instructions
Step 1 (To marinate the chicken):
- Drain the water from the chicken completely.
- Take a mixing bowl, add the chicken pieces.
- Add turmeric powder, red chilli powder, salt to taste, ginger garlic paste.
- Add lemon extract and give everything a mix.
- Add black pepper powder, cloves, cardamoms, cinnamon, coriander powder, cumin powder, shahi zeera, garam masala powder.
- Add slit green chillies.
- Add oil and give a mix.
- Add in the mint leaves, coriander leaves, crush and add fried onions, beat the yogurt well and add into the chicken.
- Mix everything well and cover the marinade.
- Marinate for at least 2 hours in refrigerator.
Step 2 (Soak the rice):
- Take about 800 gms of basmati rice, wash it thrice and soak the rice for at least 45 minutes and 1 hour is good.
Step 3 (Cook the rice):
- Take a cook pot, add good amount of water, salt as per taste, oil.
- Add whole spices such as cloves, cardamoms, cinnamon, shahi zeera, black cardamoms.
- Bring the water to a boil.
- Add in the soaked rice into the boiling water. and stir.
- Cook the rice for 10-12 minutes until it is 75% done while stirring in between.
- Switch off the flame.
Step 4 (Dum Procedure):
- Pre heat the oven to 350°F or 180°C.
- Take a baking tray.
- Add the marinated chicken all over the base.
- Add in the 75% cooked rice all over the chicken by straining the rice with a strainer.
- Spread it evenly.
- Top it up with some fried onions, coriander and mint leaves, yellow food color, oil, ghee.
- Seal the tray with an aluminium wrap.
- Place the biryani tray in the preheated oven.
- Cook the biryani for 1 hour with the same temperature.
- Take it out and remove the seal and serve hot.
- Serve hot with onion raita, bagara khana or mirchi ka salan.
Video
Notes
- Any food color can be used while garnishing during dum.
- The cook time can be increased to 10 more minutes and not more than that.

Pooja says
Nice blog... Reading this left my mouth watering ... Delicious biryani recipe and looks tempting ... Thanks for sharing:)
Sehreen says
Hey there, I am looking forward to trying your recipe. Looks amazing and simple. Can you please tell me what would be the oven rode settings for the briyani? Should I turn the bottom or the top one?
Asiya says
Just the bottom is enough as the top one gives high heat and is used to broil the meat.
Yasmeen says
A couple of tips to make this more authentic. No bari/kali ilaichi. That is not typically used in authentic Hyderabadi cooking. Also, no food coloring is added. You should soak half a teaspoon of saffron in a little bit of hot milk. That is drizzled on top of the rice. It will give the color AND the aroma of Hyderabadi biryani. Lastly, the marinate should include the oil from the fried onions in it. That same oil is also drizzled on top of the rice in the end before baking/cooking. These changes will yield a more flavorful and authentic Hyderabad biryani.
Asiya says
Thank you yasmeen for your suggestions...Authentic biryani recipes are shown on other biryani recipes on the blog...